The "Birthday Box"
Three years ago, my husband and I put together a "Birthday Box" for our Niece. Our Niece and Nephew live out of state so we try to send them something in the mail for their birthday. At the time, Rory's favorite color was purple so we included purple items. I made "Birthday Cake Cookies" and we included "10 Thing I Hate About You" after hearing she hadn't seen it before. We added Cow Tails as there are a favorite tradition that we always get them. We added some other fun items to fill up the box! She really liked it. Rory is on the left next to her friend.
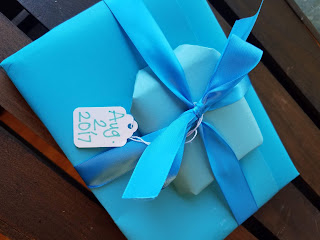
Last year, she requested a "Turquoise Birthday Box" so we went with it. I love shopping and putting gifts together for people. The Dollar Tree is the perfect place to shop for items to fill up the box. It is also cool to include specialty items or make items to include in your box.
We went with the idea of having a gift to open each day of August leading up to her birthday. August 1- August 8th. This is a very fun idea that you can do and can pick how many days you would like to include. Last year, for my friend's 40th Birthday I did an entire month of "A gift a day birthday box" Check it out here on the blog at The Ultimate Birthday Box.


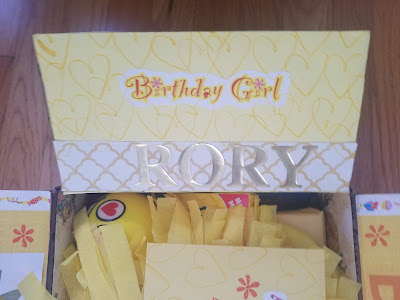
This Summer, when Rory was visiting she requested a "Yellow Birthday Box". Her new favorite color. What a fun color to work with! This box is my favorite one so far. I love how it turned out!
Do you have someone in your life that would love a Birthday Box? The following is how to make one.
How to put together a Birthday Box:
7. Decorate the box if desired: Use scrapbook paper and/or construction paper and glue to the inside of the box for an added touch. I flip the box over and trace the flaps and cut out the pieces. I even decorate the inside of the box as well. Mod Podge or any glue of choice and stick directly to the box. Gather stickers and markers to add the details to your Birthday Box. Print out fun images or pictures that go with your theme. Use stickers or markers to write out messages on the four flaps for the recipient. If you have any stamps they make great finishing touches. Let your creative juices flow! There is no right or wrong way to decorate your box. Just remember to have fun. It will all come together!


 |
| Rory's 14th Birthday Box! |
 |
| Rory's 15th Turquoise Birthday Box! |


This Summer, when Rory was visiting she requested a "Yellow Birthday Box". Her new favorite color. What a fun color to work with! This box is my favorite one so far. I love how it turned out!
 |
| Rory's Sweet 16 Yellow Birthday box |
How to put together a Birthday Box:
1. Choose a person: A friend, a co-worker or a family member.
2. Give yourself plenty of time: You can make it simple or can put a lot of time and effort into it. It is up to you on how elaborate or simple you want to make it. My experience is that birthday boxes take a lot of time to put together but are really worth it! Allow yourself extra time so you are not rushed and can enjoy the process. I always start out small and then the ideas and found items always build and come together for the perfect birthday box.
3. Pick a Theme:
A Favorite Color- The idea of this box is to find items of all one color,
A Sunshine Box- This box includes all things yellow and includes a fun sunshine saying, I used this one: Sunshine Box Label
Birthday Party Box- This is a party in a box. Include streamers, balloons, sill string, birthday candles, confetti etc.
An Ice cream Sundae Box- This box includes all the topping's, bowls, spoons etc to build the perfect birthday sundae. Include money or a gift card for the recipient to buy ice cream or frozen yogurt when they receive their box.
A Movie Night Box- This box includes snacks and a gift card or dvd for the recipient to enjoy a movie night at home to celebrate their birthday.
Pinterest has tons of great ideas to help you pick out a theme. The ideas are limitless. You can also just fill it will all their favorite items.
4. Make a list of desired items or their favorite things:
•Candy
•Candles
•stationary
•pens
•pencils
•tea
•coffee
•nail polish
•little toys
•little trinkets
•snacks
•seasonal items
•decor items
•coffee cup
•tea cup
•flower seeds
•washi tape
•lip gloss
•office supplies
etc.
A birthday or just because card to include in your box.
Tissue paper or wrapping paper if you desire to wrap any items.
(Don't worry if you can't think of items. Once you have a theme you are good to go for the next steps!)
•Candy
•Candles
•stationary
•pens
•pencils
•coffee
•nail polish
•little toys
•little trinkets
•snacks
•seasonal items
•decor items
•coffee cup
•tea cup
•flower seeds
•washi tape
•lip gloss
•office supplies
etc.
A birthday or just because card to include in your box.
Tissue paper or wrapping paper if you desire to wrap any items.
(Don't worry if you can't think of items. Once you have a theme you are good to go for the next steps!)
5. Get a box: We use the medium flat rate boxes from the local Post Office. This is the most economical way to ship items. You can pick up boxes for free and pay once your box is decorated and filled. We love using the Kiosk so we don't have to wait in long lines and can go after hours if needed.
6. Go Shopping: We always start at the Dollar Tree for the basics and if they don't have a specific item we picked it up at a different store.
Don't be afraid to make baked items or craft items from things that you are already have on hand. I always use left over craft items, decorations and other things around the house that add an extra touch to the box. I made this yellow banner out of streamers left over from my friends 40th Birthday party. If you haven't made one of these yet there are simple and look super cool hanging up. Check it out here: DIY Tassel Garland
 |
| All the Yellow Items!! |
 |
| Yellow Streamer Banner |
7. Decorate the box if desired: Use scrapbook paper and/or construction paper and glue to the inside of the box for an added touch. I flip the box over and trace the flaps and cut out the pieces. I even decorate the inside of the box as well. Mod Podge or any glue of choice and stick directly to the box. Gather stickers and markers to add the details to your Birthday Box. Print out fun images or pictures that go with your theme. Use stickers or markers to write out messages on the four flaps for the recipient. If you have any stamps they make great finishing touches. Let your creative juices flow! There is no right or wrong way to decorate your box. Just remember to have fun. It will all come together!
 |
| Love this little saying! |


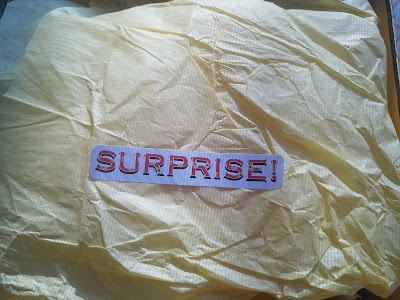
8. Assemble the box: Fold your box and tape the bottom with clear tape (if you haven't already). You can either wrap individual items or can place items directly into the box. I tend do a little of both. Wrap some items, use tissue paper on others and just place some items into the box. The mix makes it more interesting for the recipient when they open the box.
 |
| Fill it up! |
9. Get added items if needed: Got extra space? Find more items to fill up the empty spaces. Once, it is filled I place the greeting card on top of all the items and then add a piece of tissue paper on top.


10. Deliver or mail your "Birthday Box": Yay! It is all done, now just have to get it in the mail or to the recipient and see how much they love it.

Let me know how your Birthday Box turns out!
Love and Prayers ❤
-Amber

Love and Prayers ❤
-Amber

Comments
Post a Comment